No More IP Addresses: How to Connect a Custom Domain and SSL to Your First App | ReUneek
No More IP Addresses: How to Connect a Custom Domain and SSL to Your First App
Bilal AhmedJul 15, 2026 • 5 min read
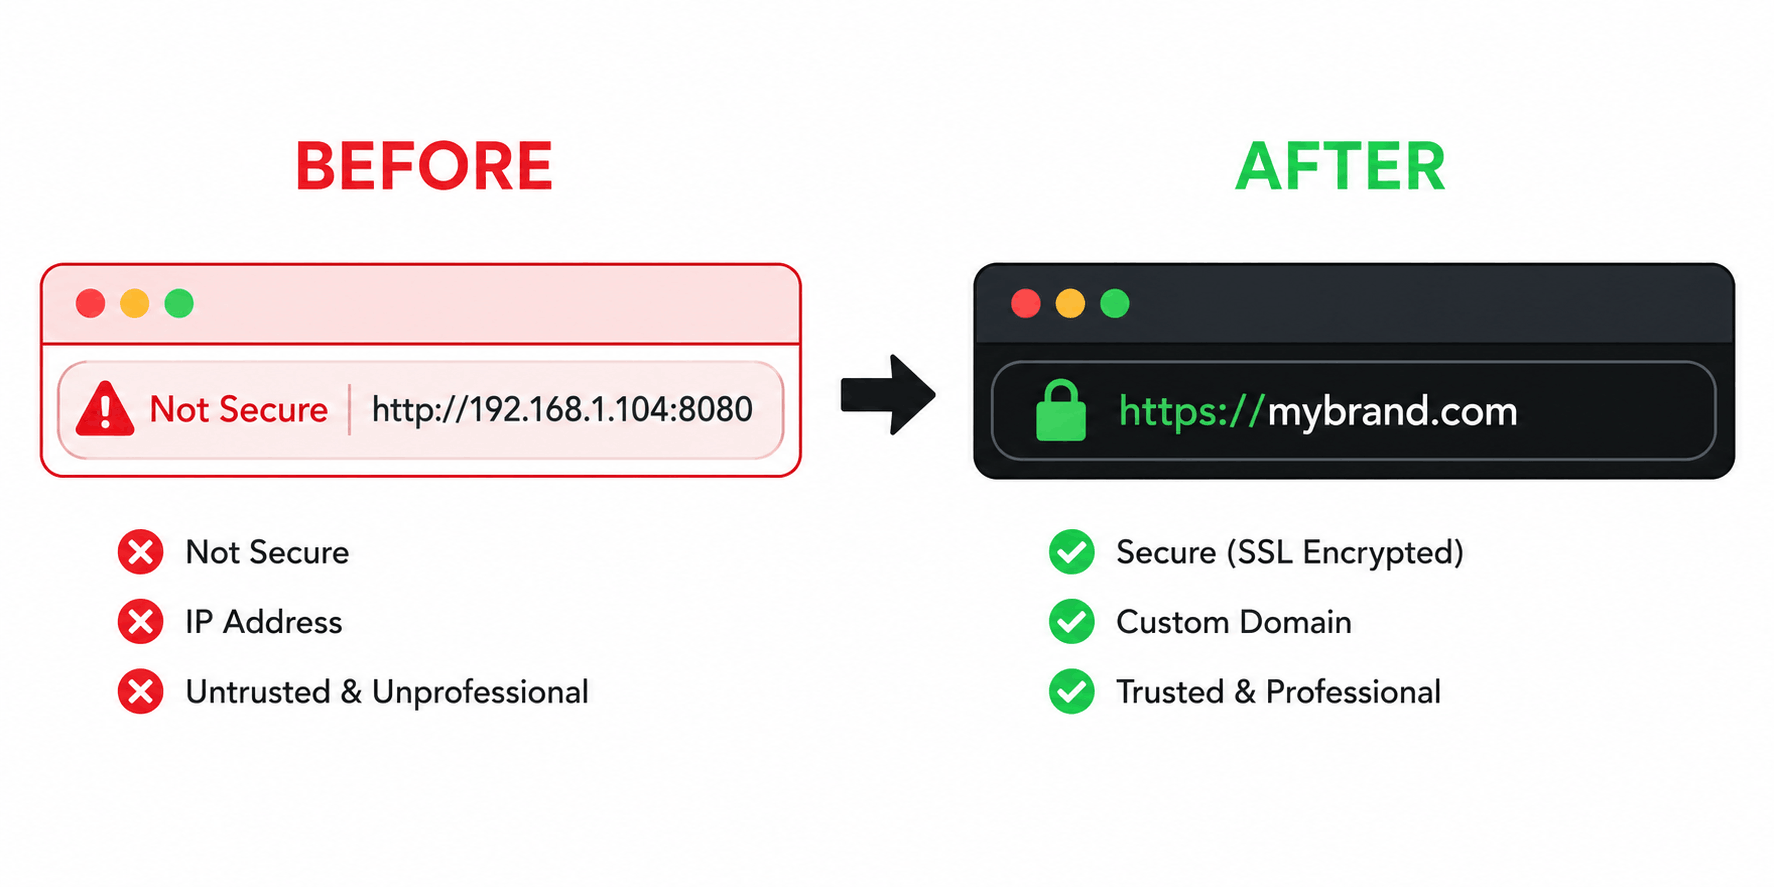
You did it. from Previous Guide On Cloud Deployment as beginner You pushed through the pain of setting up a Virtual Private Server (VPS), you cloned your code from GitHub, and your full-stack app is officially running in the cloud. You proudly text your friend the link to check it out:
http://167.99.123.45:3000
Let’s be honest, that looks terrible. It looks like a sketchy link that might steal your credit card information.
If you want clients, users, or recruiters to take your project seriously, you cannot hand them a raw IP address. You need a clean, memorable custom domain (like reuneek.com), and you need that little padlock icon in the browser bar that says the connection is secure (SSL/HTTPS).
In this guide, we are going to bridge the final gap between a raw server and a professional, production-ready web application. We will break down exactly how DNS works, how to point a domain to your server, and how to secure it for free usingLet’s Encrypt.
Step 1: Securing Your Custom Domain
Before we touch any server configurations, you need to actually own the name you want to use. This is where a Domain Registrar comes in.
A registrar is simply a company that manages the reservation of internet domain names. You do not have to buy your domain from the same place you bought your hosting, but keeping them together can sometimes make management easier.
For The Budget-Conscious: if you Just want a cheap ".com" or ".dev" to get started, Namecheap is fantastic and incredibly easy to nevigate
The All-in-One Solution: If you followed our previous Guide On Cloud Deployment as beginner and grabbed a Hostinger VPS plan, you can actually register your domain directly through their hPanel. This is highly recommended for beginners because it keeps your billing and DNS management all in one single dashboard.
Pro Tip: If you are building a developer portfolio, look into .dev or .io domains. They instantly signal to recruiters that you are in the tech space.
Step 2: Pointing the Domain to Your Server (DNS Magic)
Right now, your domain and your server have no idea the other exists. We need to introduce them using the Domain Name System (DNS). Think of DNS as the phonebook of the internet. When someone types your domain into their browser, the DNS looks up the matching IP address and routes the traffic there.
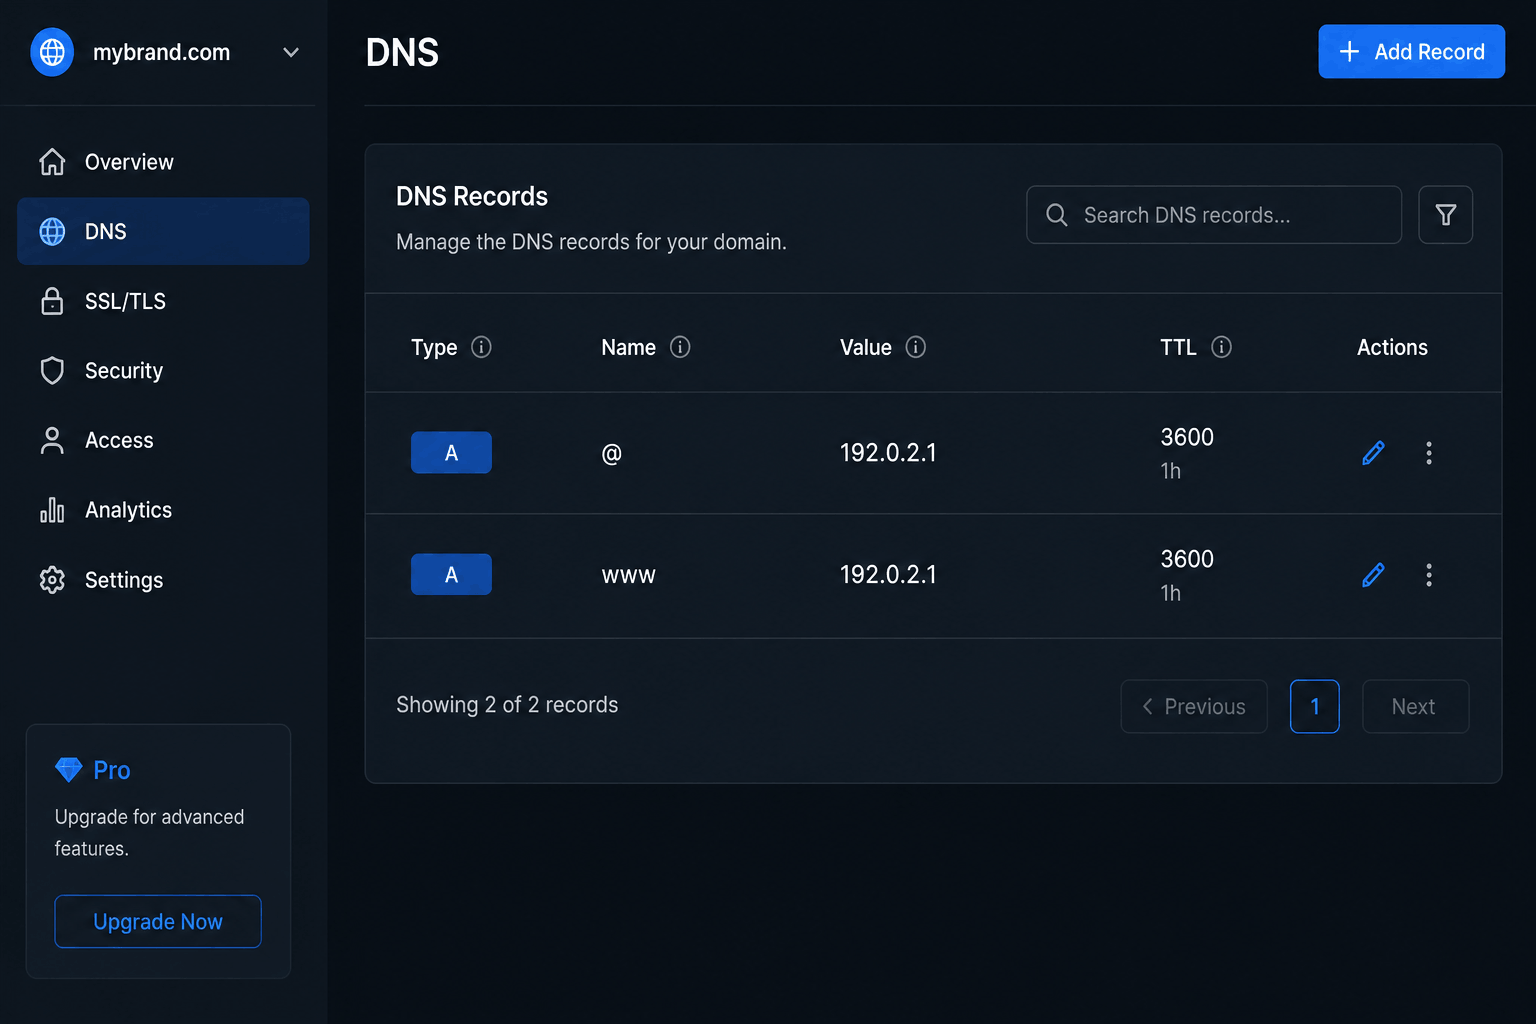
To make this happen, we need to create an A Record (Address Record).
How to Set Up Your A Records
1.Find your Server IP: Log into your hosting dashboard (e.g., DigitalOcean or Hostinger) and copy the public IPv4 address of your VPS.
2. Access DNS Management: Log into the platform where you bought your domain and find the "DNS Settings" or "Advanced DNS" page.
3. Create the Root Record:
TYPE: A Record
Host / Name :@ (This symbol represents your root domain, e.g., yourdomain.com)
Value / Points To : Paste your server's IP address.
TTL : Automatic or 3600 (This is the "Time to Live," or how fast the record updates).
4. Create the WWW Record:
TYPE : A Record (or CNAME)
Host / Name : www
Value / Points To : Paste your server's IP address again.
Note: DNS propagation can take anywhere from a few minutes to 24 hours. Be patient! You can use a free tool like whatsmydns to check if your domain has successfully connected to your IP globally.
Step 3: Configuring Nginx to Listen for Your Domain
At this point, if you type your domain into the browser, it might still fail. Why? Because your Node.js or Python app is likely running on a specific port (like 3000 or 8080), but standard web traffic defaults to port 80 (HTTP).
We need a Reverse Proxy to catch the traffic coming to port 80 and hand it over to your application. Nginx is the industry standard tool for this.
SSH into your server and let's configure Nginx.
1. Create a new server block file for your domain:
Boom! If you visit your custom domain now, you should see your app live.
Step 4: Securing Your App with Free SSL (HTTPS)
We have a custom domain, but we are still serving traffic over HTTP. Browsers will slap a big "Not Secure" warning on your site, which terrifies users.
To fix this, we will use Let's Encrypt, a free, automated, and open certificate authority. We will install their certificates using a tool called Certbot. As of 2026, the standard way to install Certbot on Ubuntu is via "SNAP ."
# Ensure snapd is up to date
sudo snap install core; sudo snap refresh core
# InstallCertbotsudo snap install --classic certbot
# Link the certbot command so it can be run from anywhere
sudo ln -s /snap/bin/certbot /usr/bin/certbot
Generating the SSL Certificate
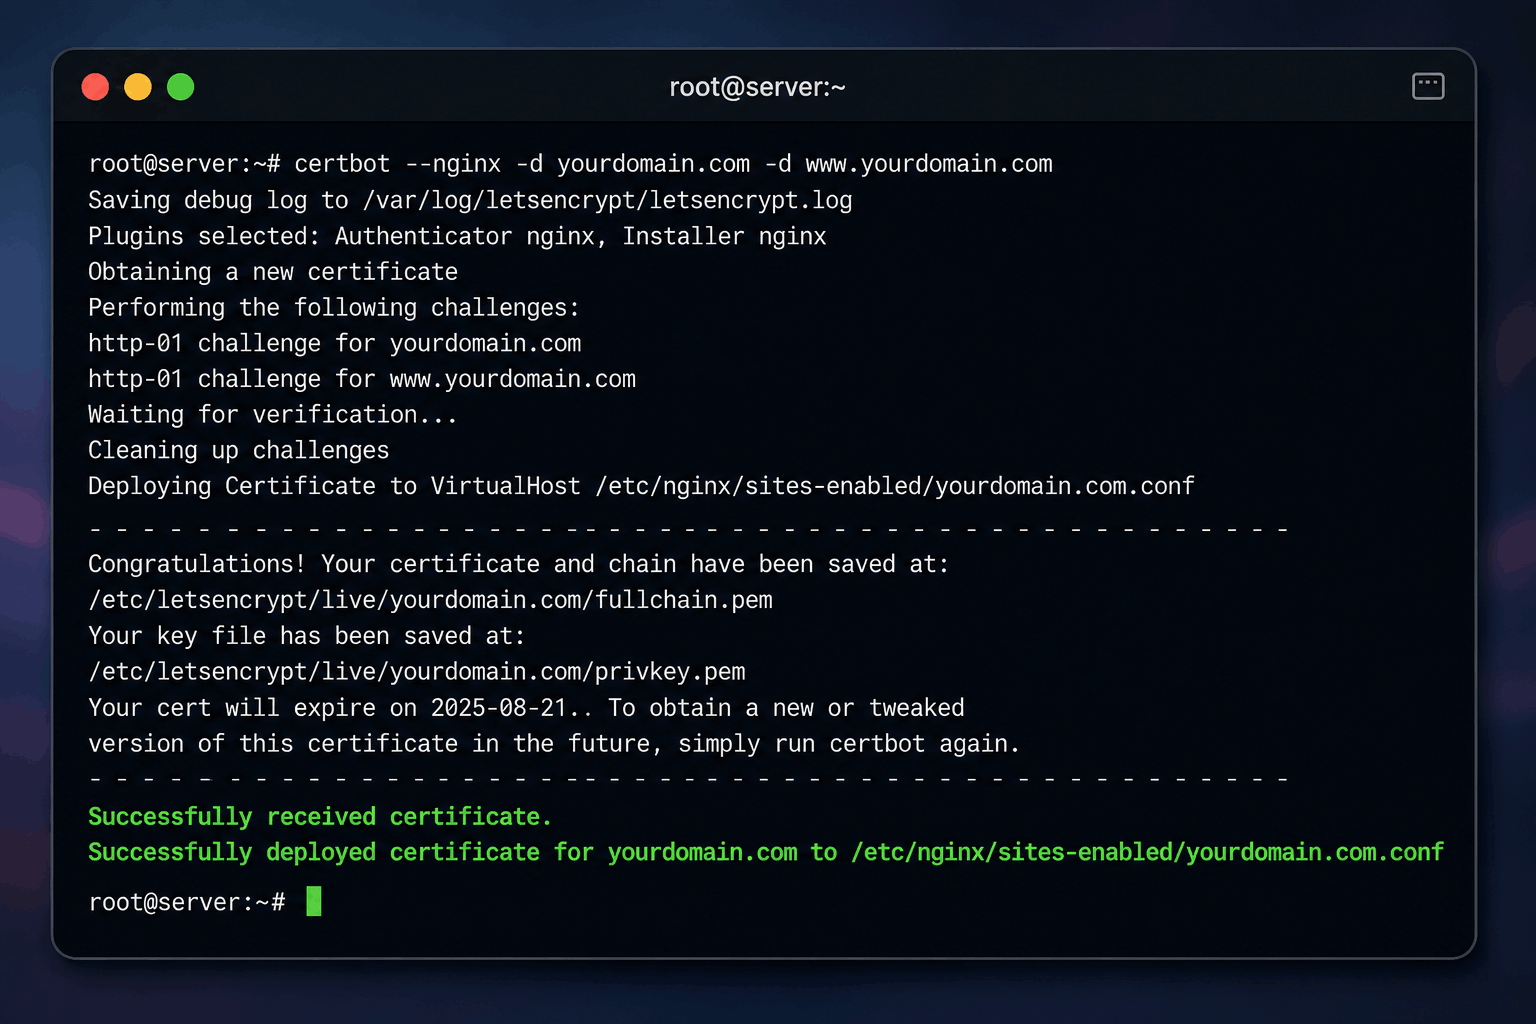
Because we are using Nginx, Certbot makes this incredibly easy. It will read our Nginx configuration, find our domain name, request the certificate, and even rewrite our Nginx files to force HTTPS routing automatically.
Enter an email address (for urgent renewal and security notices).
Agree to the Terms of Service.
Choose whether or not to share your email with the EFF (optional).
Select the domain names you want to activate HTTPS for (usually, you just press Enter to select all).
If everything is configured correctly, Certbot will congratulate you and let you know that your certificates have been saved.
The Magic of Auto-Renewal
Let's Encrypt certificates are only valid for 90 days. But don't panic! The Certbot package we just installed automatically creates a system timer that runs twice a day to check if any certificates are up for renewal. If a certificate is within 30 days of expiring, Certbot renews it automatically in the background. You literally never have to think about it again.
Summary
Let’s recap what you just accomplished:
You secured a professional identity for your project via a custom domain.
You mastered DNS A records to route global traffic to your specific server IP.
You configured an Nginx reverse proxy to securely route port 80 traffic to your localhost app.
You provisioned an enterprise-grade SSL certificate to encrypt user data and secure the highly coveted browser padlock.
This workflow, buying a domain, pointing the DNS, configuring Nginx, and running Certbot is the exact same process used by senior engineers to deploy production applications.
You aren't just coding on localhost anymore. You are officially building and deploying on the live web.